 Vivitar Vivicam 10 Tutorial
Transferring Pictures to the Computer
Saving the Photo's from your ALBUM to use in other Applications
Deleting Pictures on the Camera
Setting the Environment to
Take Pictures
1. Turn the camera
on by pressing the Power Button Button until it beeps.

2. Press the mode button to cycle through the possible shooting
environments (below). You will need to
click three times before you begin to see the environment icon options
below. Once you determine
the shooting environment, press the
"Select" button.
3. Look in the view finder and press the shutter button when you are ready to take your picture.
1. If you need the Flash, use the Mode button to cycle through
until you see the Auto Flash mode icon
below. Press the Select button.

1. Press the Power button and hold it until
the camera beeps.
2. This camera automatically turns itself
if inactive for approximately 60 seconds.
Transferring Pictures to the Computer
1. Open the USB compartment and connect your
camera to the USB cable that is attached to your
desktop/laptop computer.
Match the two USB icons.

2. Open up the ArcSoft PhotoImpression software.

3. Click on the Get Photo icon. 
4. Now, Click on Camera/Scanner from the list. ![]()
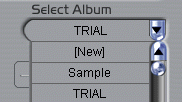
5. Select the Album title where you want your
pictures saved. You can create New Album titles, such
as Christmas02, Workshop,
etc.

6. Then, Click on the scanner/camera icon. ![]()
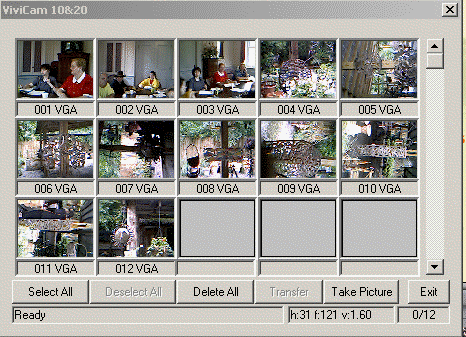
7. The pictures from the camera will show up
as thumbnails on the screen as below:

8. You can select all of the photos to transfer to the selected album or you can select the specific photo's you want to transfer to your selected album on your hard drive.
9. IF . . . you select Delete All, then
the photo's will be deleted from your camera and they will not
be on your computer unless
you've transferred them before you clicked on the Delete ALL button.
Saving the Photo's from your ALBUM to use in other Applications
1. Double -Click on the thumbnail of the picture you want to save and use in another application, such as a PowerPoint or a Web Page. The full-sized picture will load into the main page.
2. Click on the Save As icon. ![]() This option will allow you to save the file with a different
This option will allow you to save the file with a different
name, or to a different
drive or folder.
3. If you Select the Save Icon, this option
will overwrite the existing file in your album with new
changes you've made
in the photo editing software.
Deleting Pictures on the Camera
Pictures can be deleted from the camera using the
(A) ArcSoft Editing Software or (B) they can be
deleted from the camera by using the Mode button.
A. In the ArcSoft PhotoImpression Software,
Select the particular pictures you want to delete or
you can select all
of the photo's and then Click the DELETE ALL button.
B. To delete all of the pictures on the digital
camera press the Mode button until you see:
![]() ALL
ALL
Press and HOLD the Select
button until the camera blinks and the picture counter shows 0,
To Delete the LAST picture
taken, press the Mode button until you see:
![]() LST
LST
Press and HOLD the Select
button until the camera blinks and the picture counter shows 1 less
picture count.